
Citroën CX Oil Filter Relocation
Oil Filter Access on the CX Is Difficult
When was the last time you changed your oil filter?
The CX oil filter is difficult to reach, especially on the later years where the interior ventilation system and other things get in the way. On the earliest models, up to 1978, you could remove the spare tire and reach in from the top. But the later heater/AC fan design prevents that.
The Series II CX, with the electrically adjusted suspension, makes it extremely difficult to reach the oil filter. One web site even describes moving the exhaust by disconnecting the front mount on the sub-frame, and removing a shield around the suspension motor! While the filter can be unscrewed from the engine using a long socket extension, the loose filter must be shifted over the exhaust to find a gap to drop it through to remove it from the car. Not impossible, but pretty challenging.
The best way to get to the filter is to move it!
Where to put it?
Late Series I, All Series II CXs
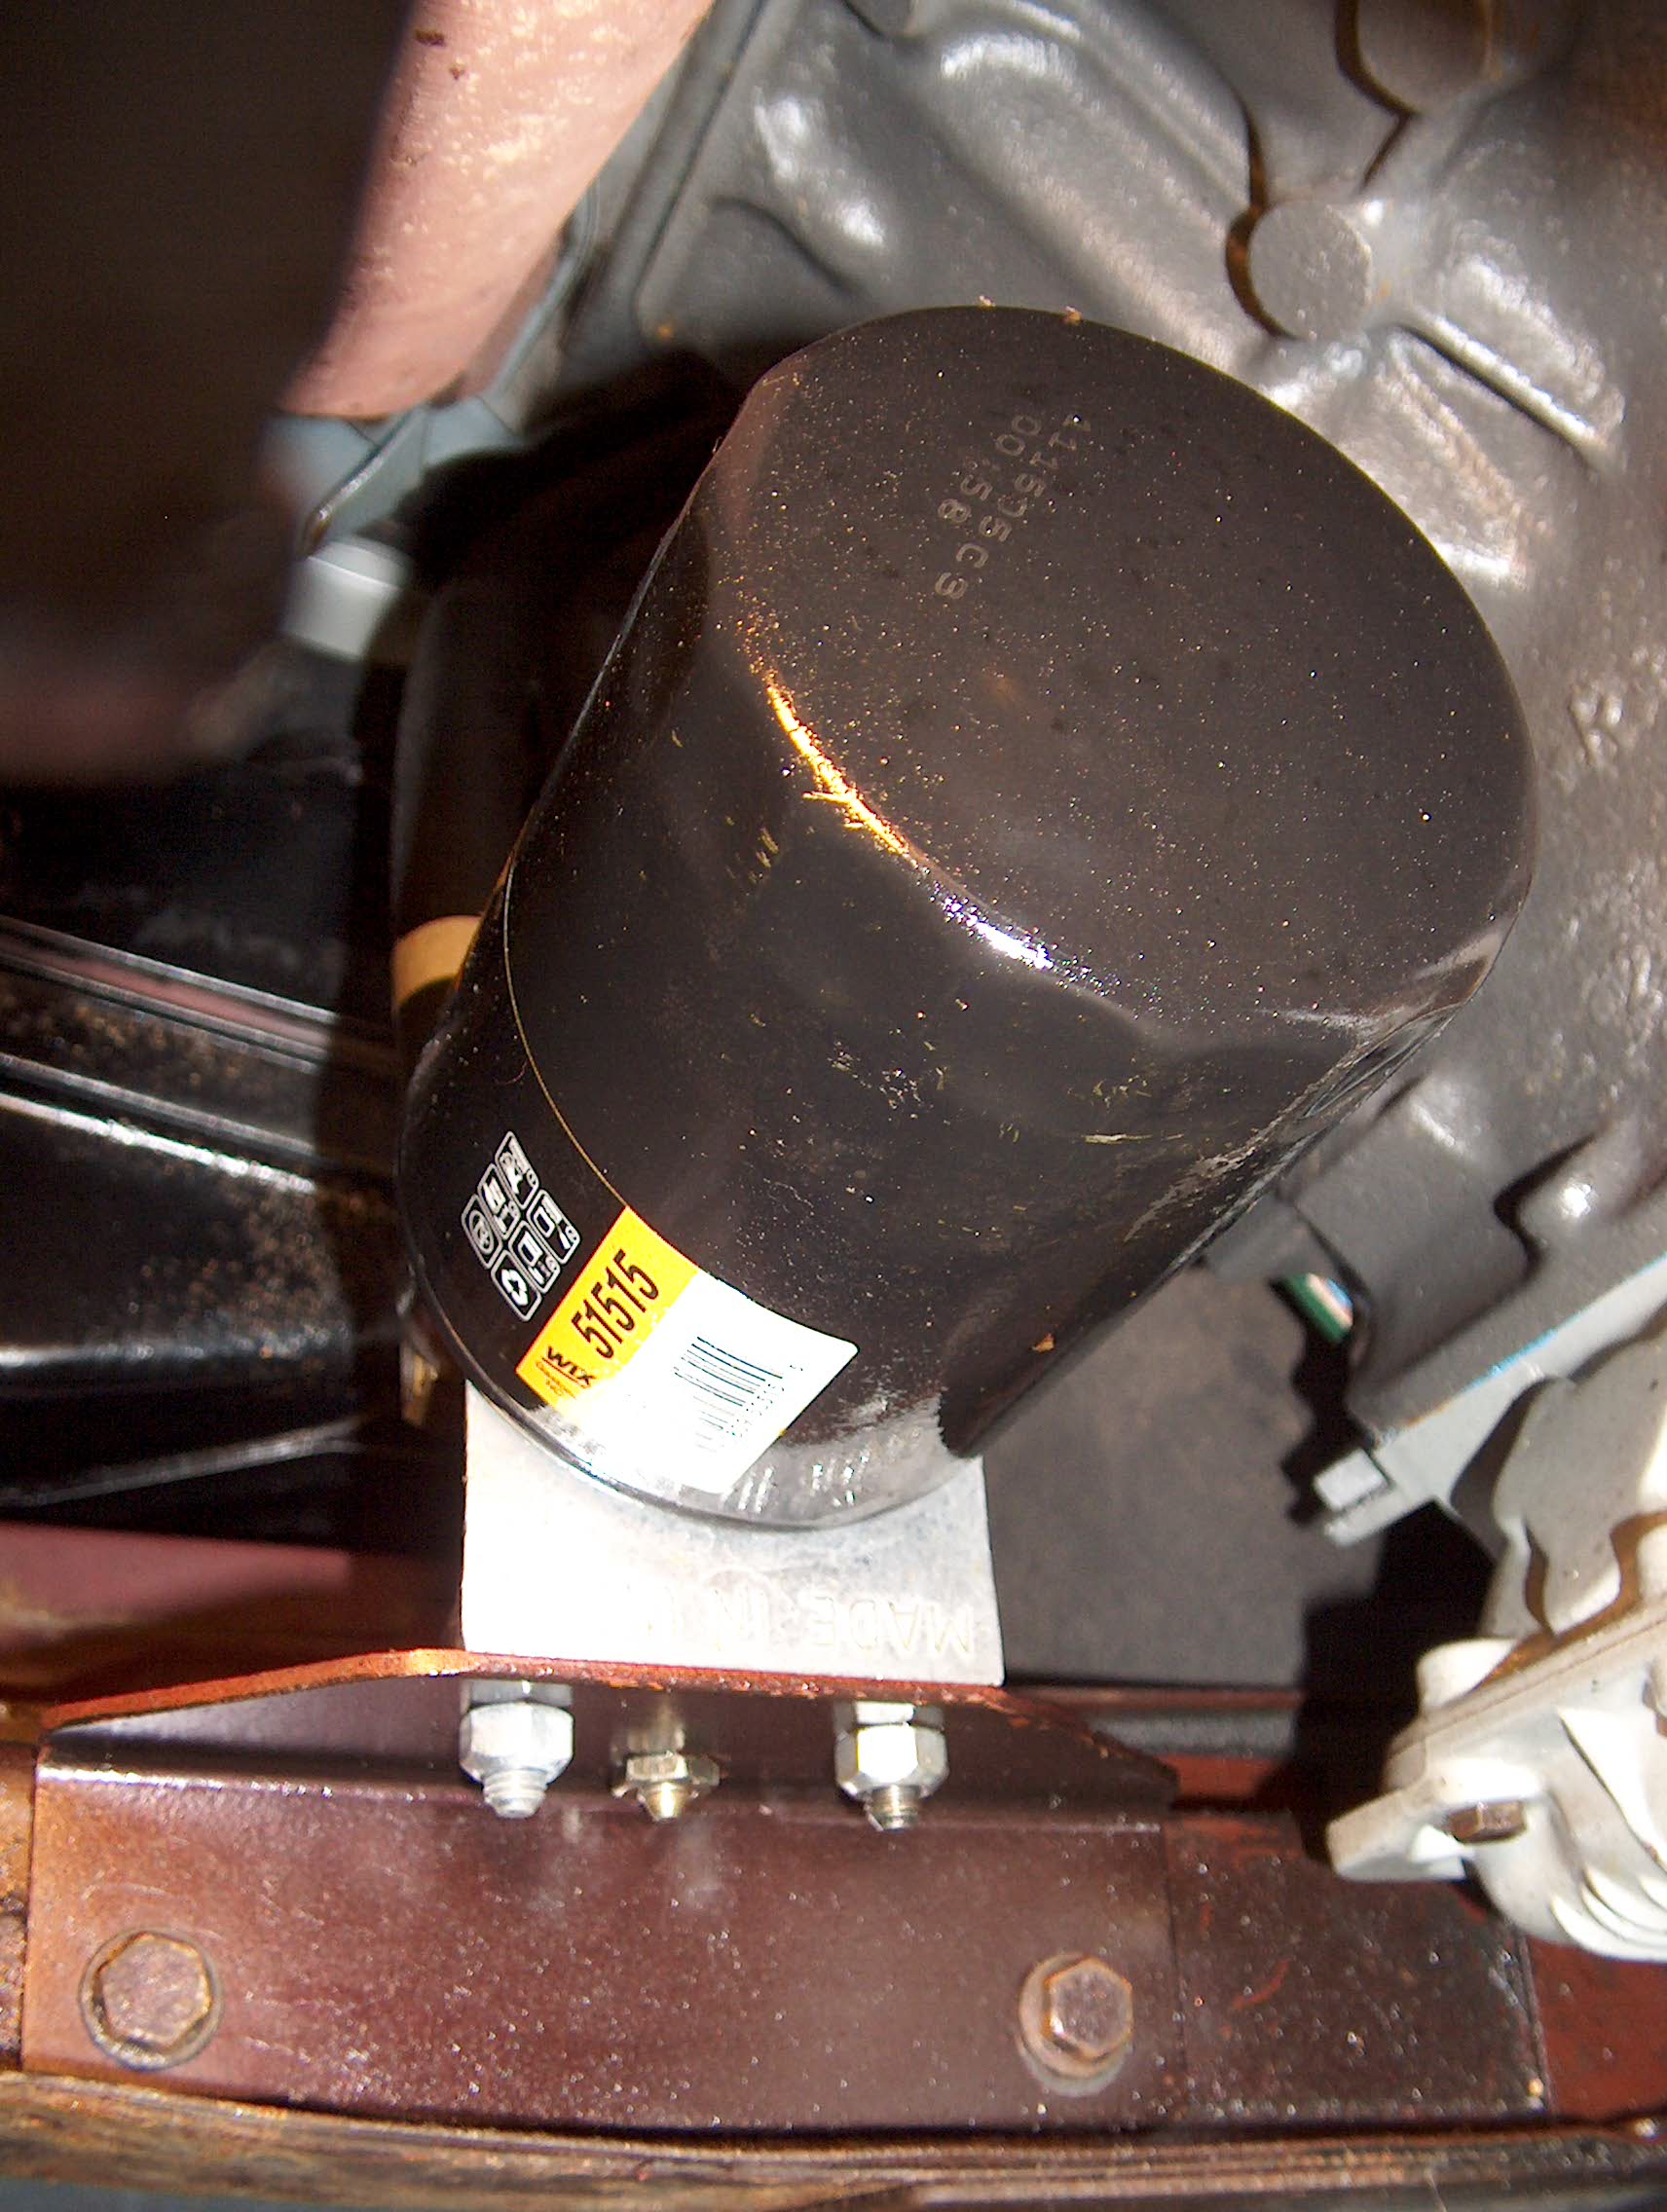
The oil filter located in place of the intake resonator. |
The CX engine bay is very crowded to say the least. The filter location must be:
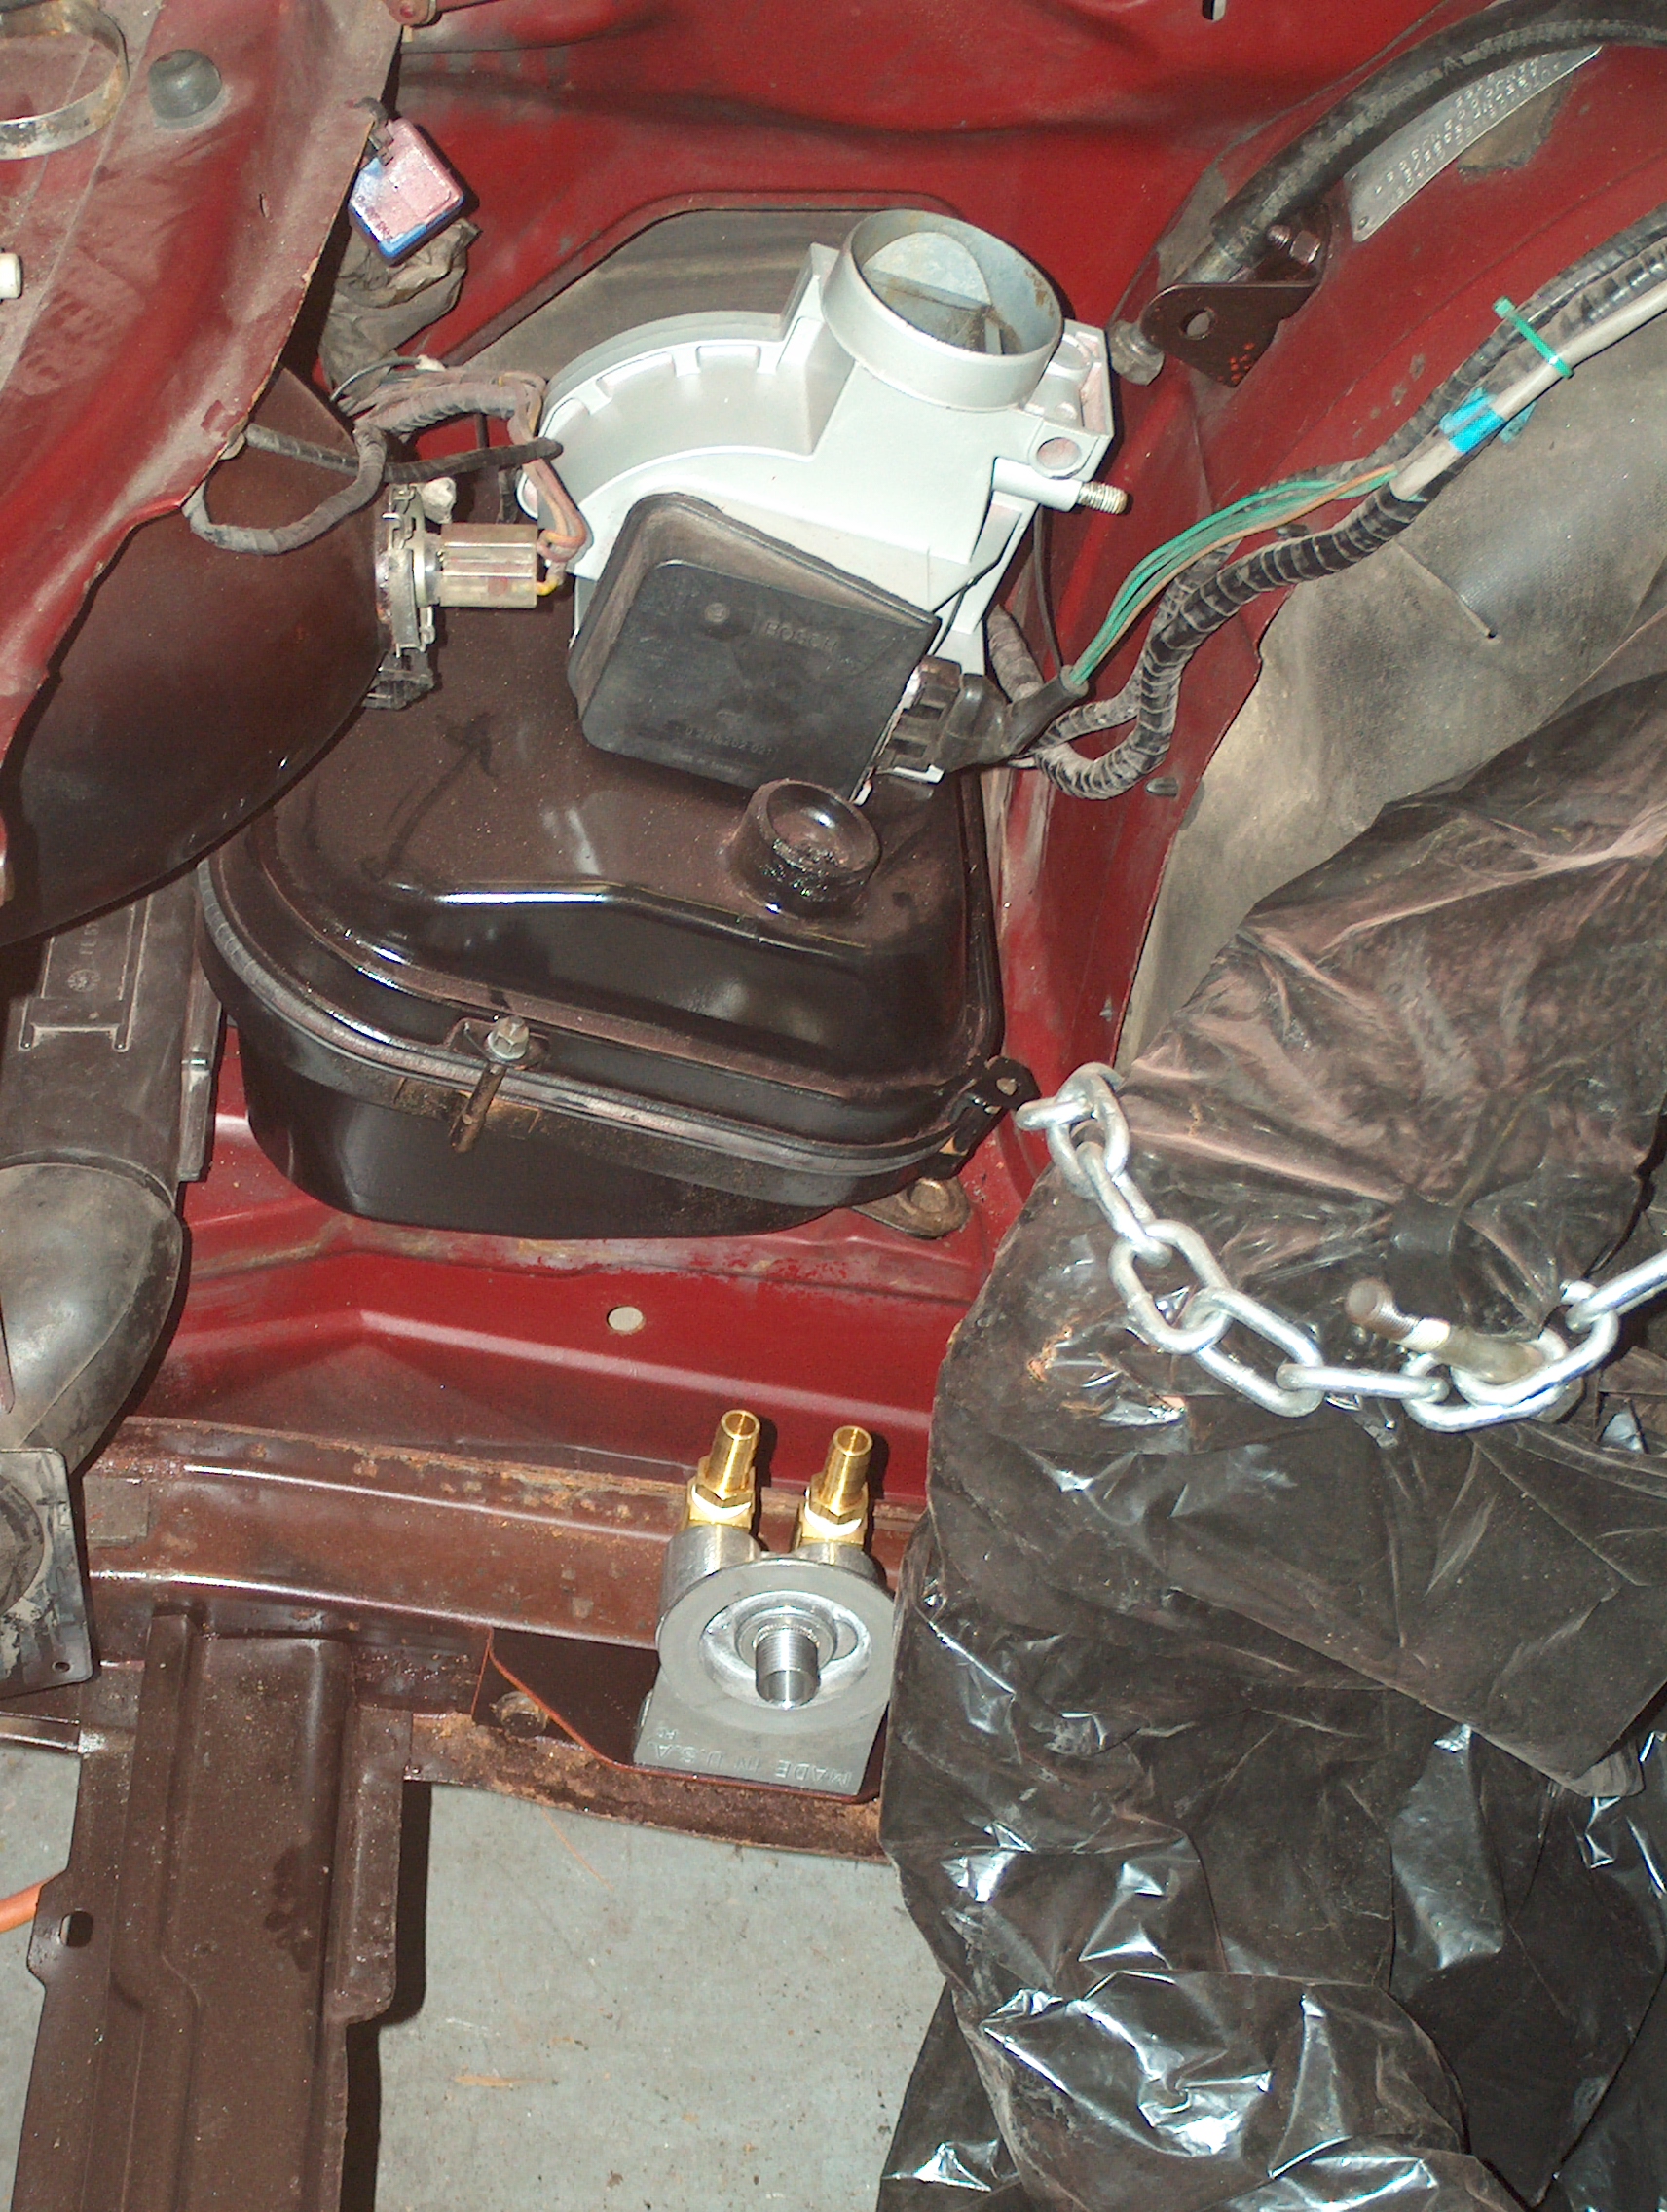
The later CXs use a small air chamber (a canister) to reduce induction noise. This canister is located on the right sub-frame, behind the radiator and in front of the engine. Good idea, however on almost all CX's I've seen with this canister, the canister is broken. Often the break isn't easily seen, it's cracked at the rear of the canister and so the crack is hidden. Once broken it loses its ability to seal the air cleaner, becoming a source of unfiltered intake air because the canister is connected to the air cleaner housing after the filter. |
Side view of the new filter holder mounted in place of the intake resonator. |
Why not remove this canister (if it's there) and kill two birds with one stone - move the oil filter and correct the air filtration problem that was probably unknown! Alert: This position has not been validated on Turbo models! Note: Just know that this engine bay was empty of engine when this was photographed. |
CX Athena/Reflex Models and the CX20/22 models |
|
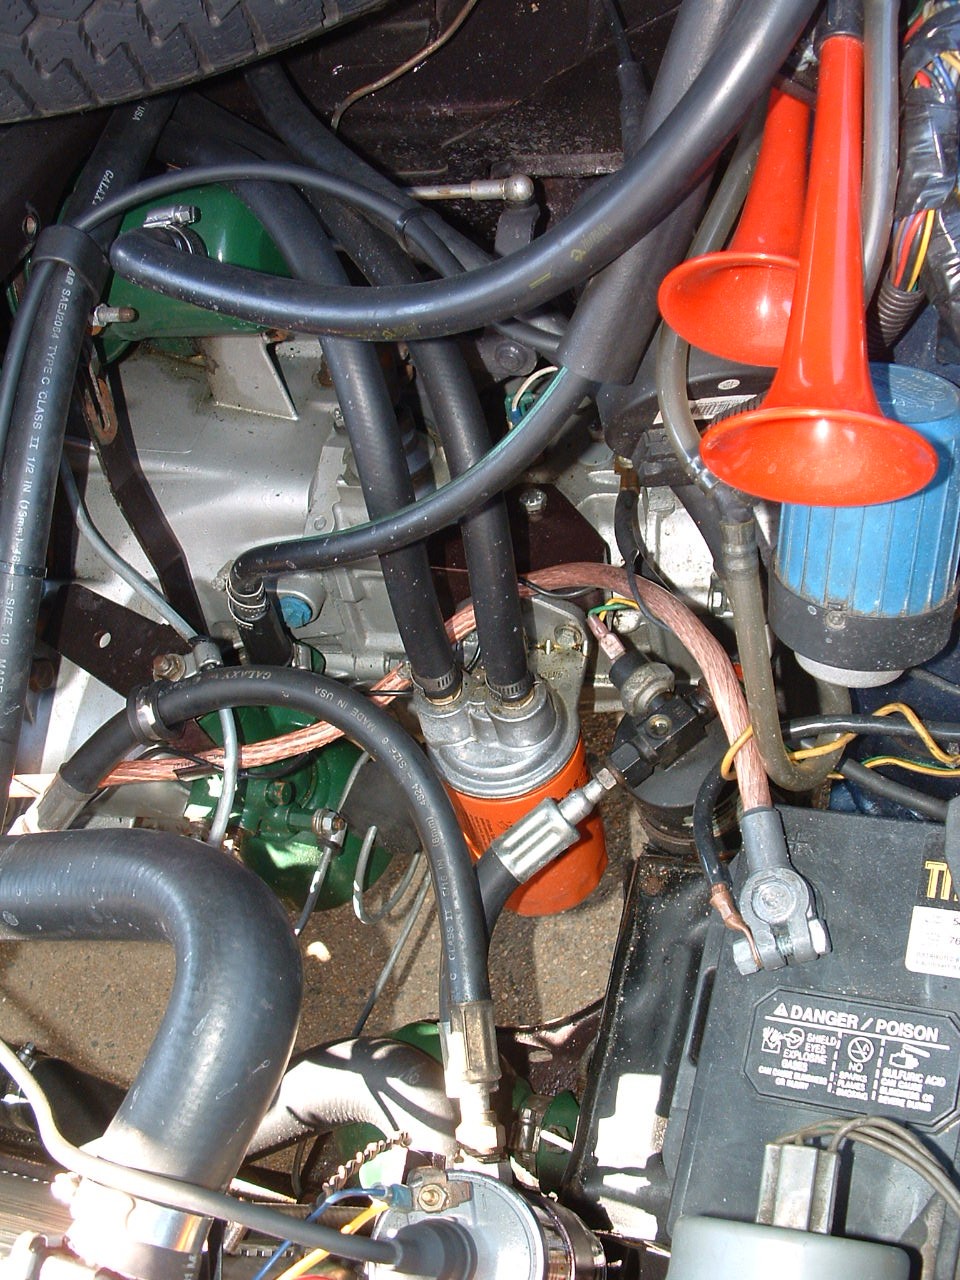
Relocation on a CX with the Douvrin engine placed on the front of the transmission. |
These models use the Douvrin engine which puts the AC compressor in the way of the location described above. A good location for these models is on the front of the transmission, essentially where the other models have the hydraulic pump. This does mean creating a more complex bracket, as shown in these photos. No right angle adapters for the hoses are used here, but are still needed on the adapter on the engine. |
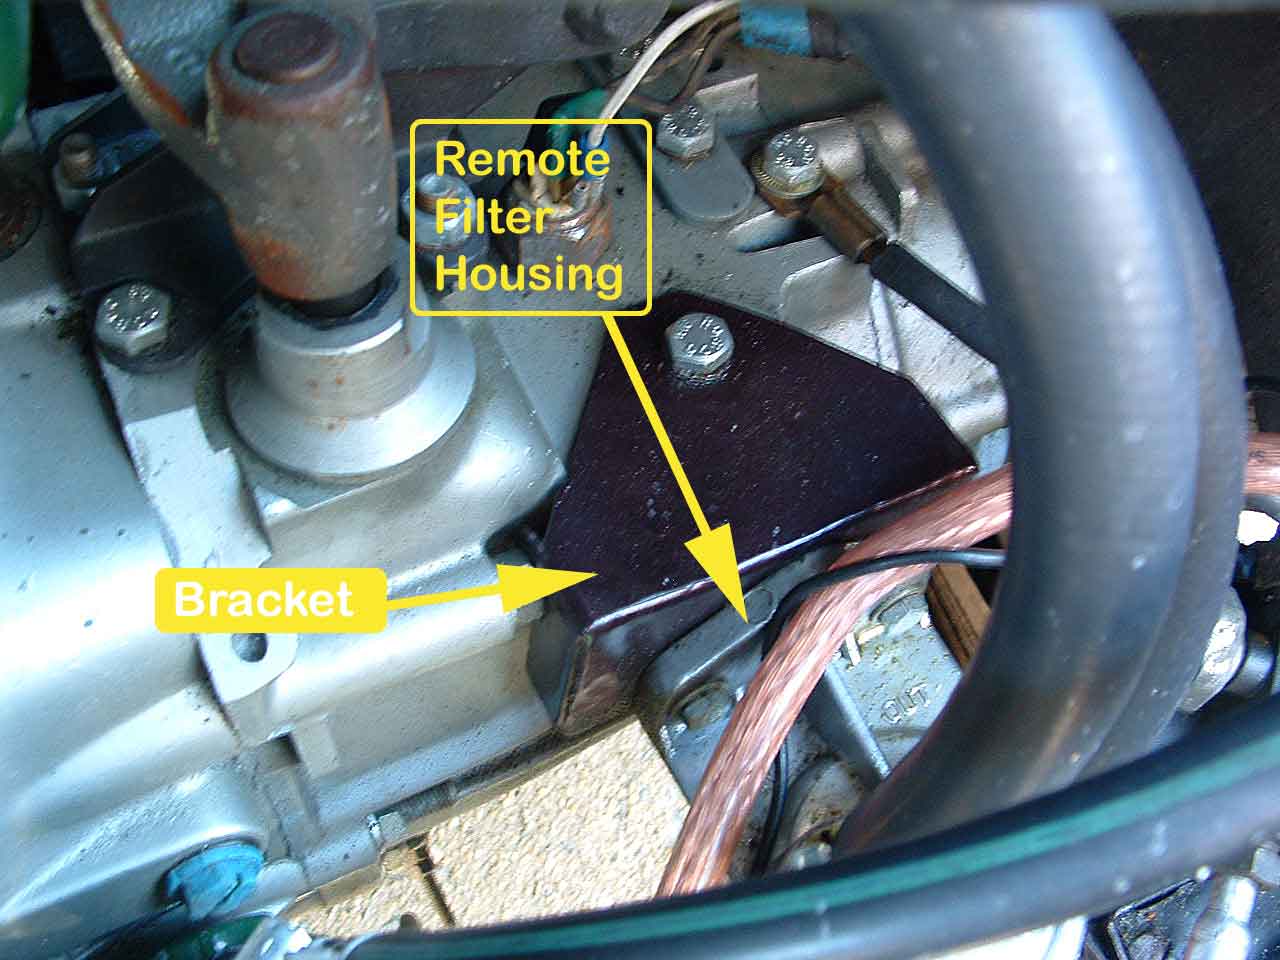
Closeup of the bracket created to mount the oil filter housing on a CX with the Douvrin engine. Note the ear for the transmission bolt, just under the yellow arrow. |
This example uses aluminum sheet that is easy to work with, but is fairly mild and flexes easily. Some may desire to use mild steel, well primed and painted to prevent corrosion. Note the bracket has an ear to bolt to the transmission mount bolt. A long extension socket is used from the other side of the bracket to tighten the bolt. |
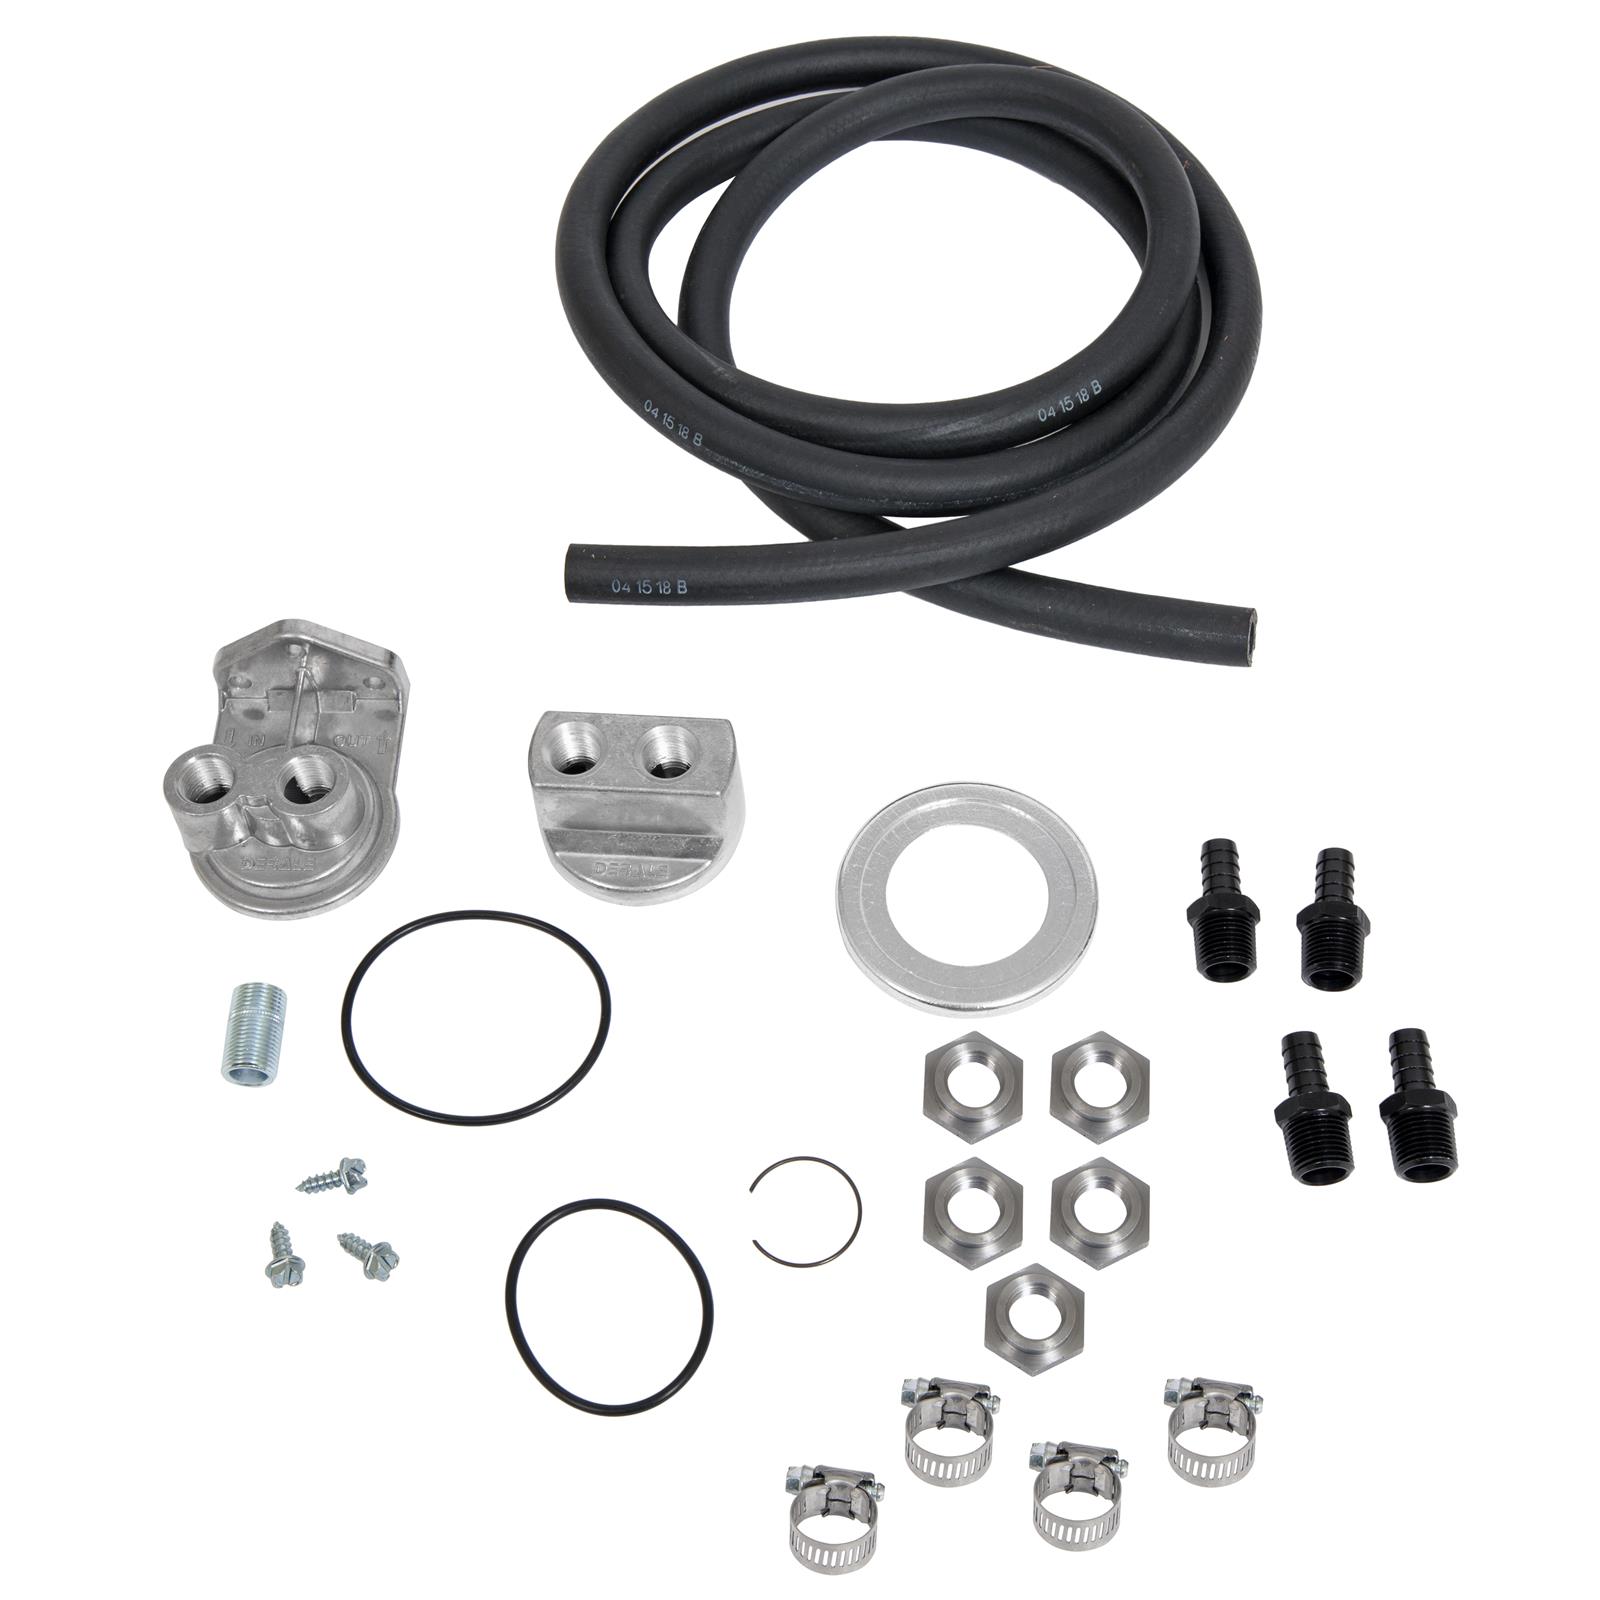
Relocation kit and Installation Tips |
|
|
Buy a kit, like what's pictured here, and move your oil filter! Follow the instructions, but one tip is to label each hose (but the provided hose into two piece) at each end with "IN" and "OUT". Imagine that each hose has oil go IN, then go OUT. Each fitting, at the engine and at the new location, has a port for IN and a port for OUT. Each hose should be labeled with an IN end and an OUT end. Connect them to the same labeled port and you won't go wrong. |
Prepared oil filter hose fittings |
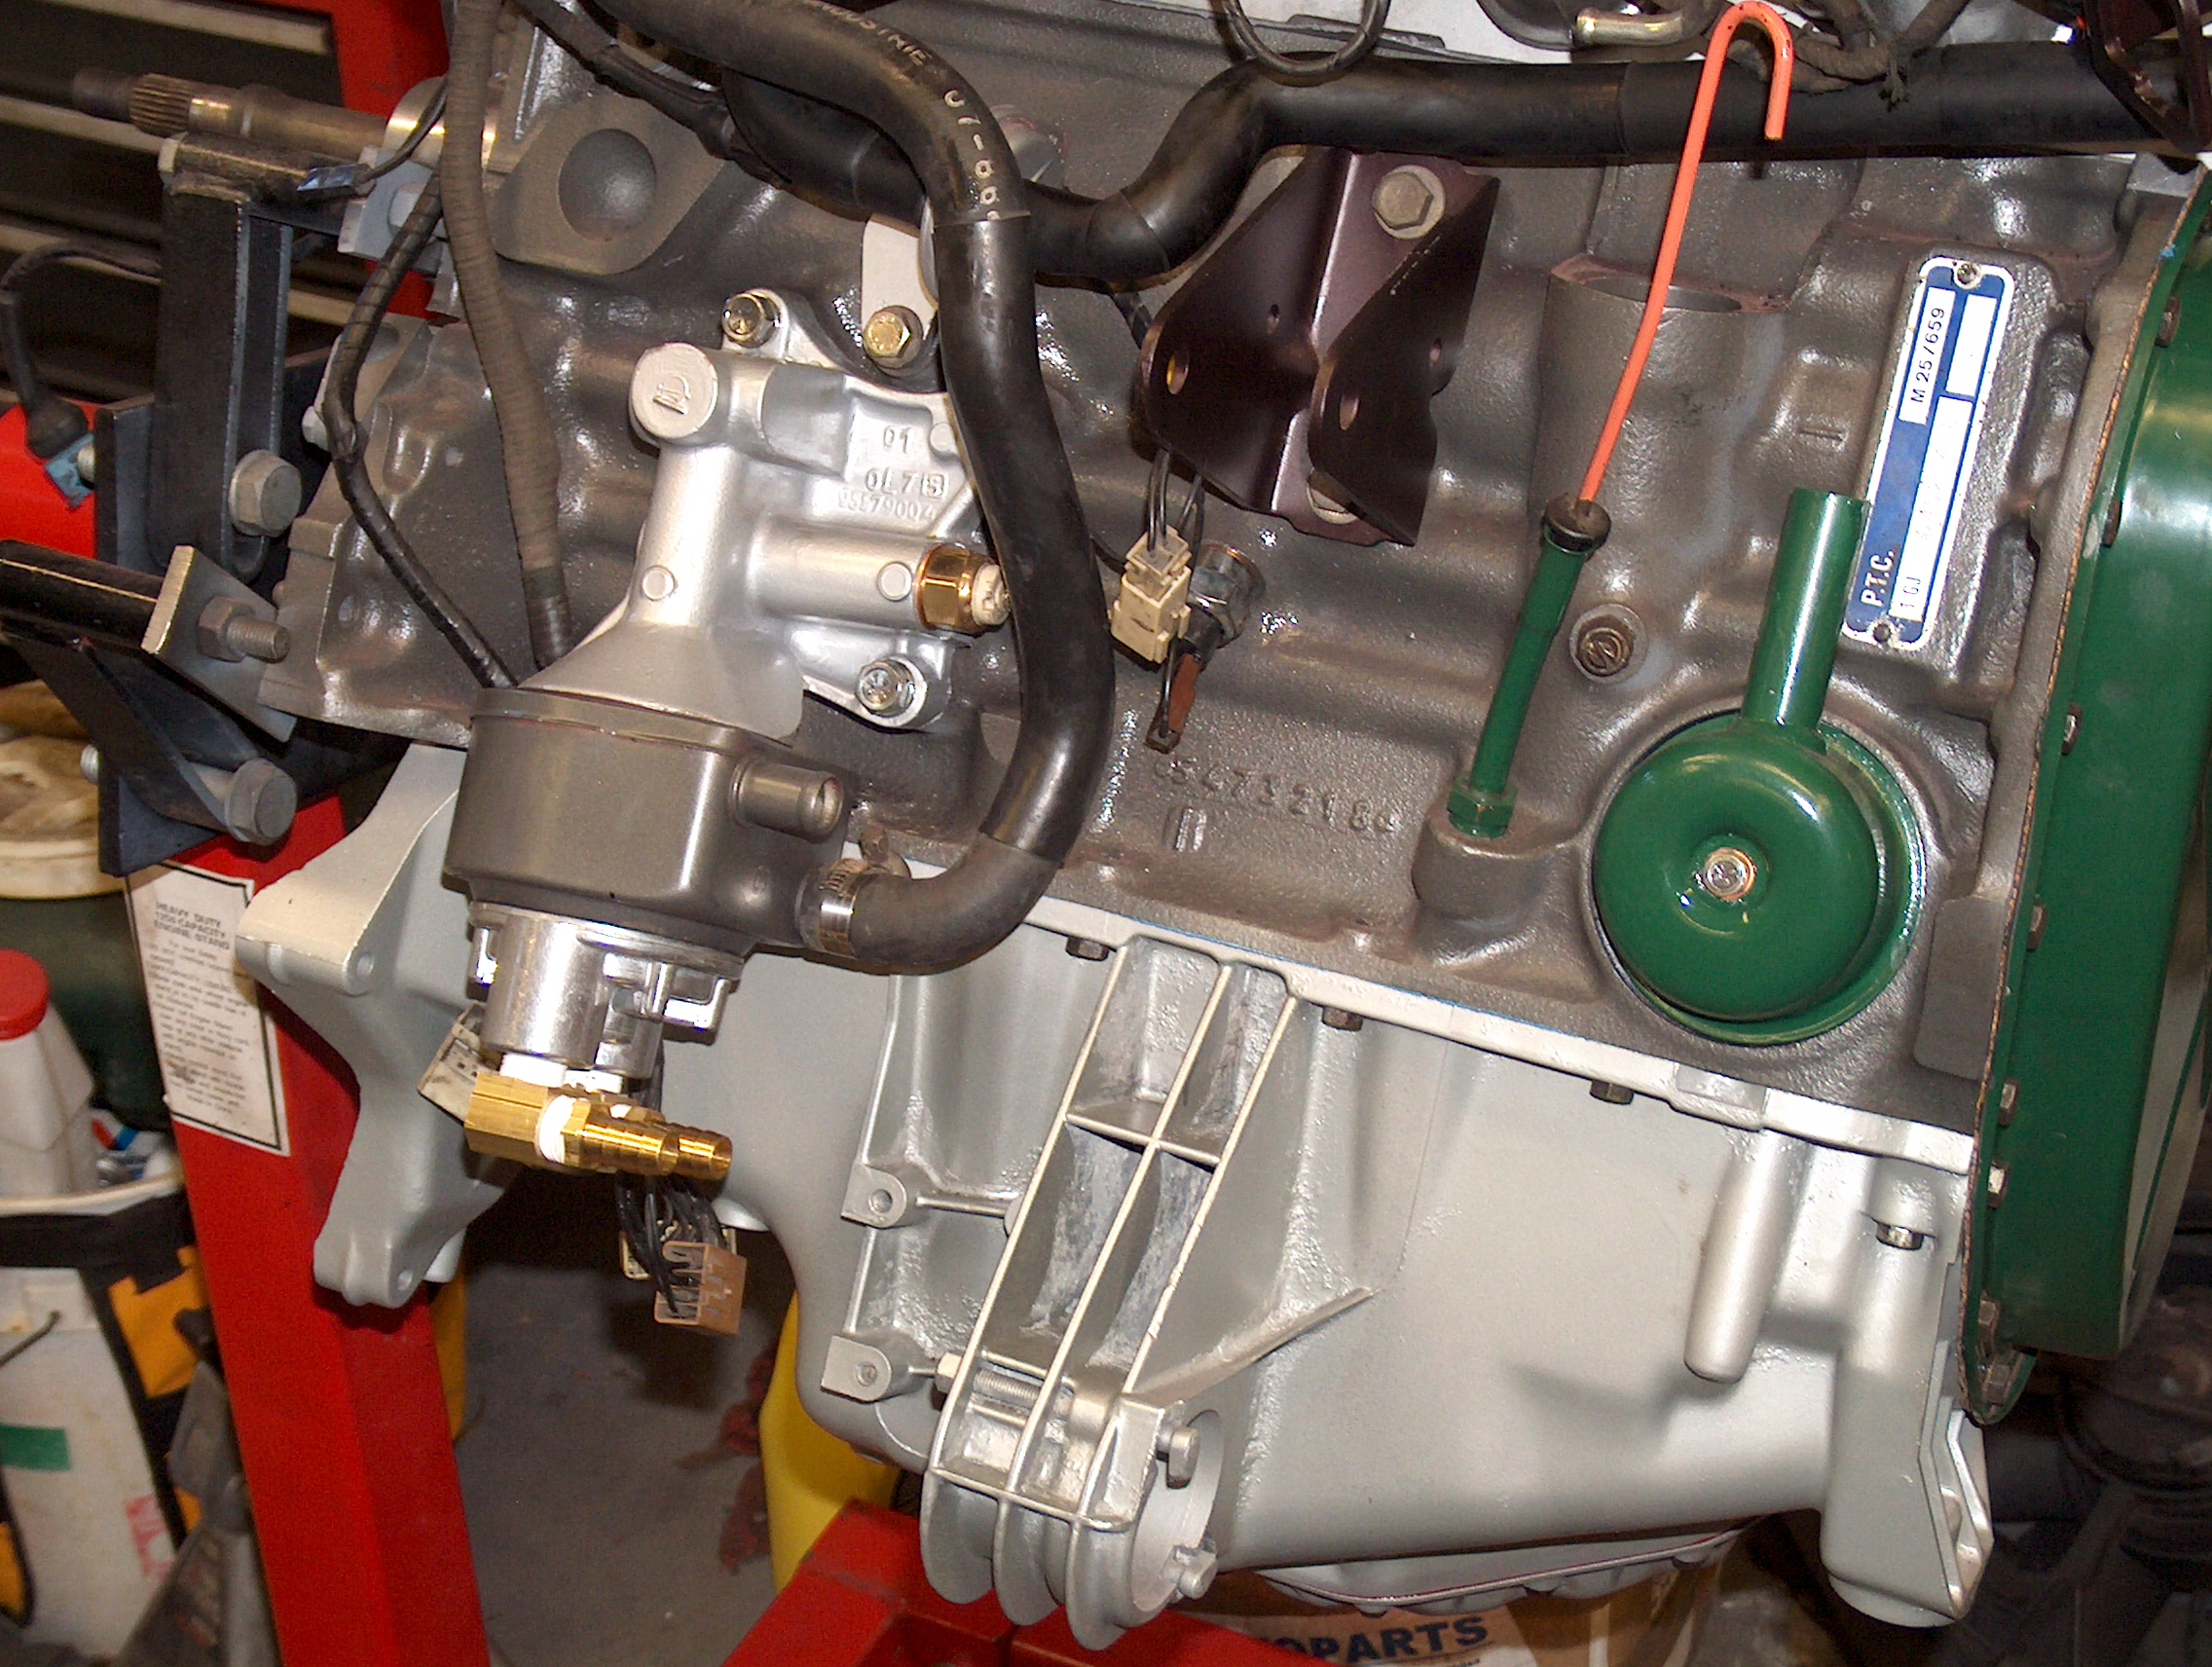
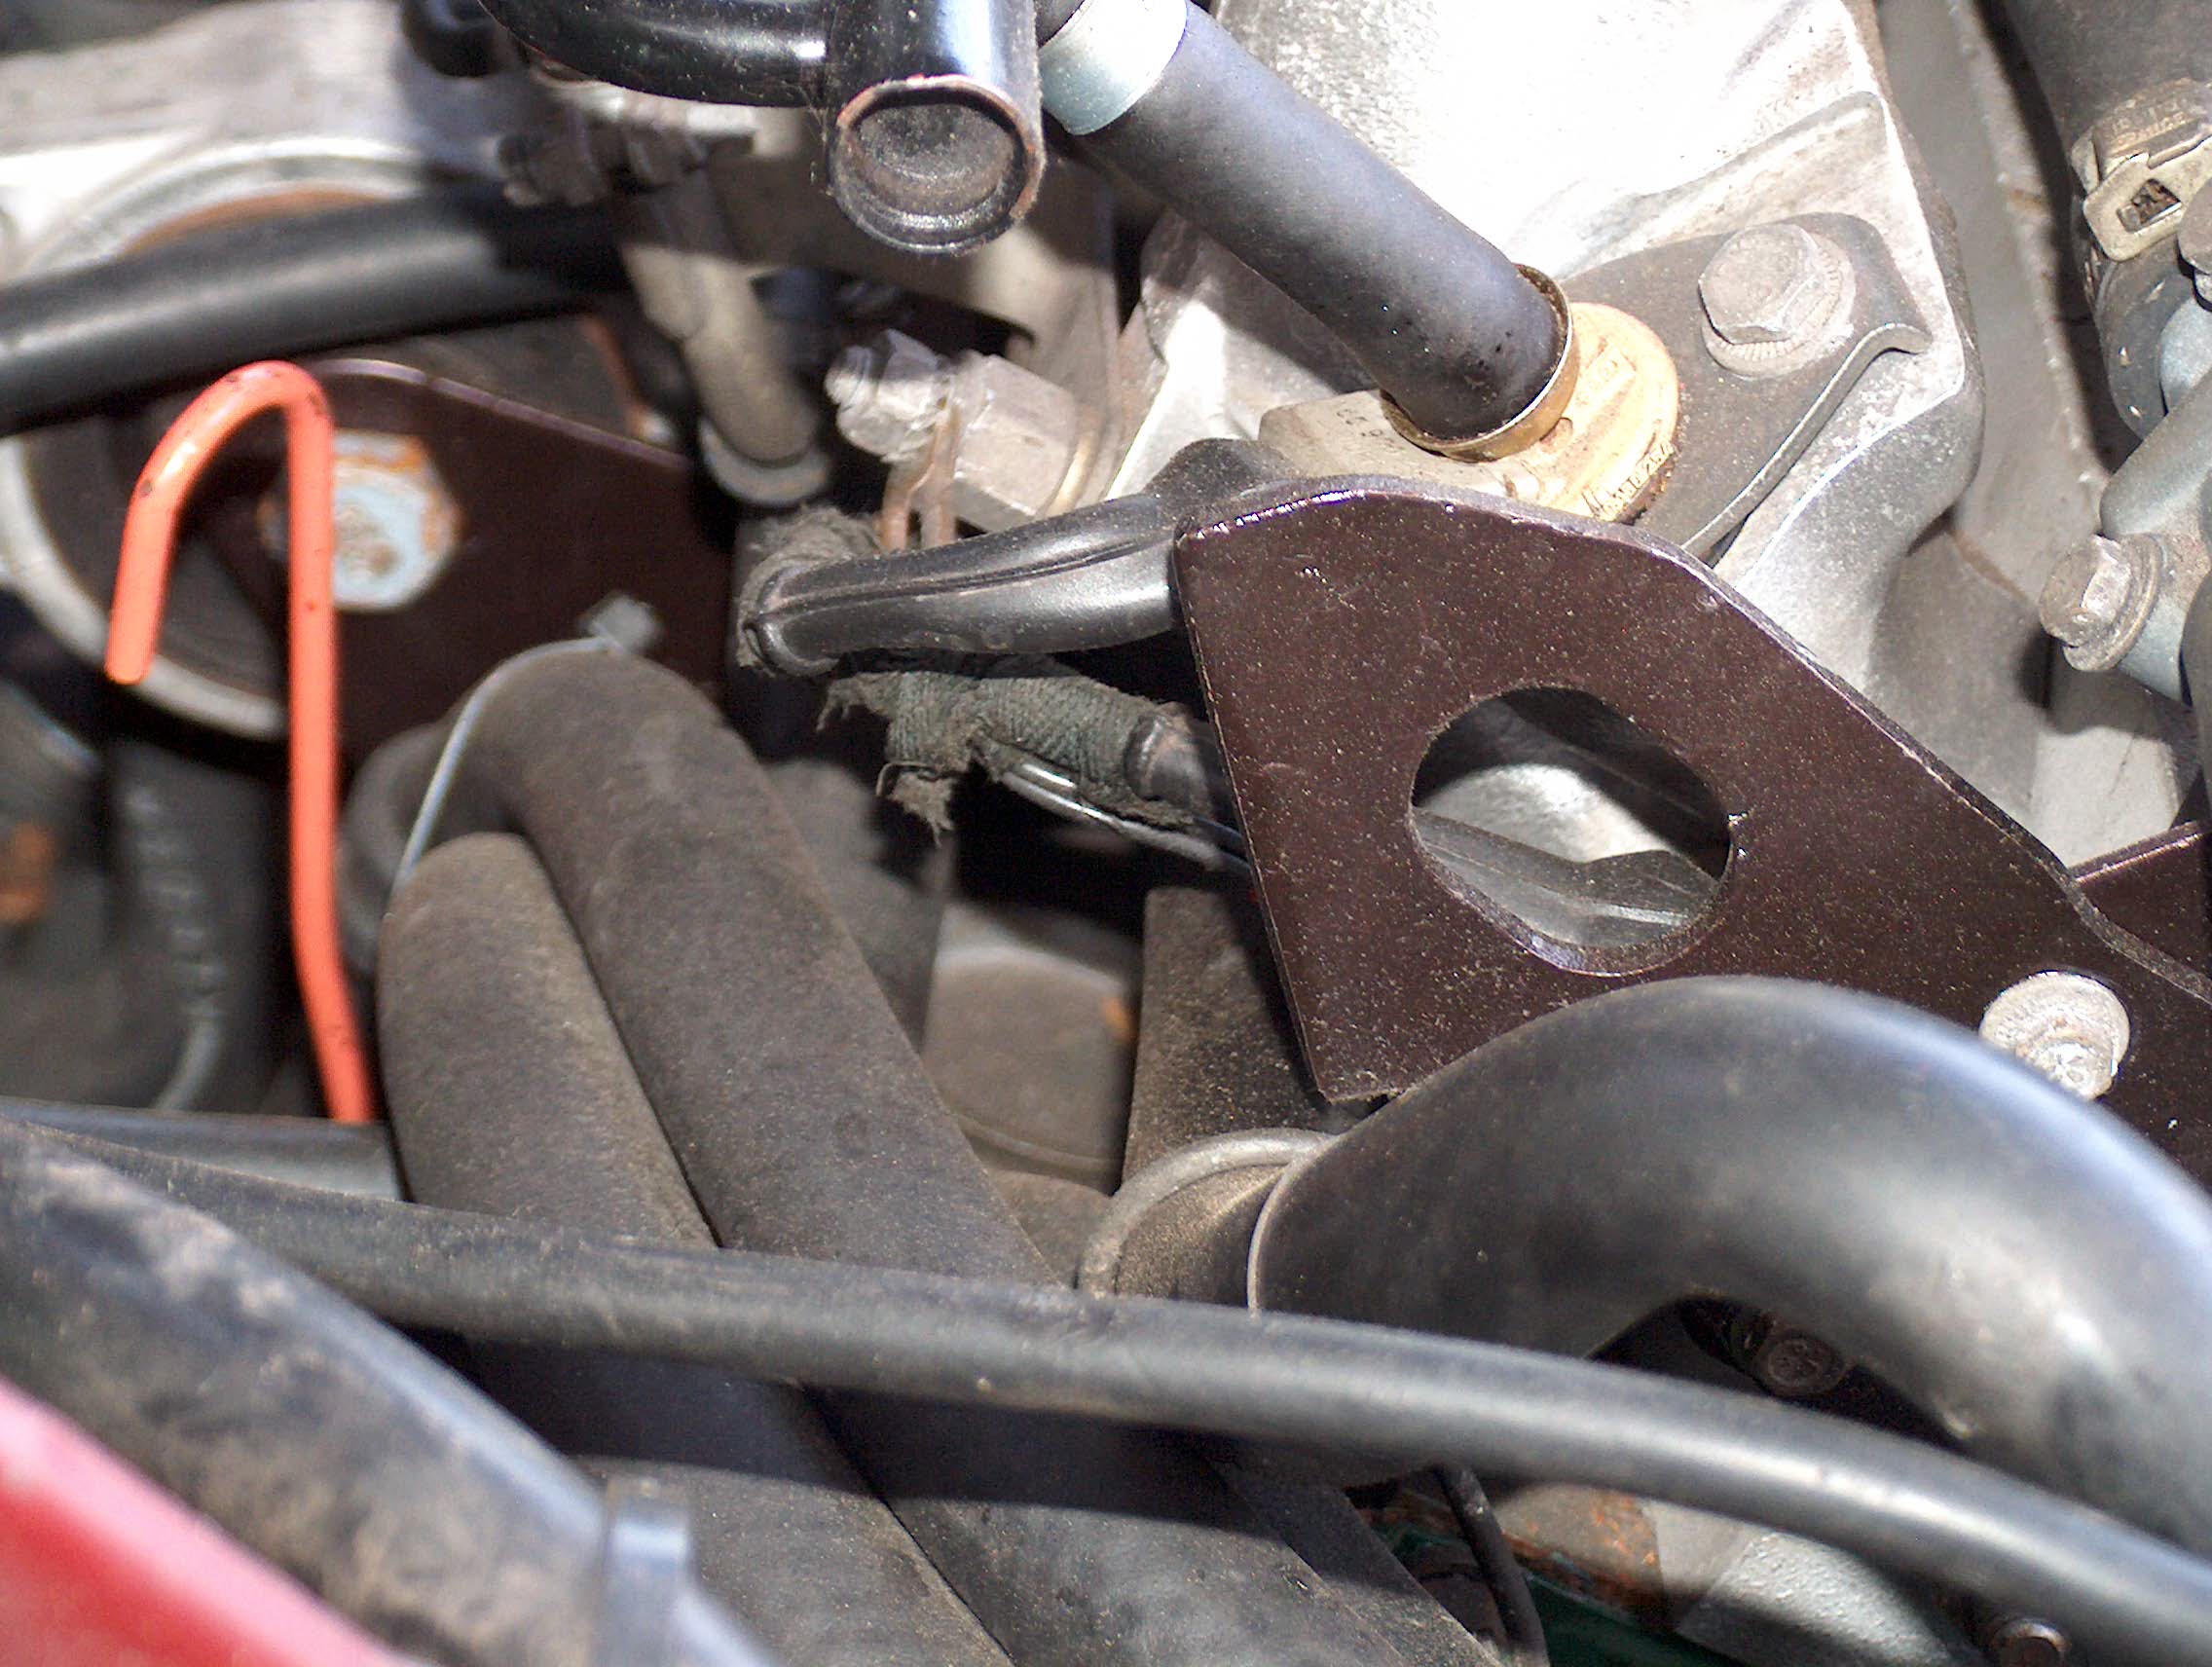
Here you see the filter kit installed on the oil cooler. Use two right angle adapters to point the hoses toward the timing chain end. Route the hoses behind the oil dipstick. |
|
Cut off the bracket designed to hold the diagnostic connector. This is necessary to avoid damage to the oil hoses that route here. Secure the hoses appropriately, but allow them some freedom of movement or you will have a failure at the connection from vibration. |